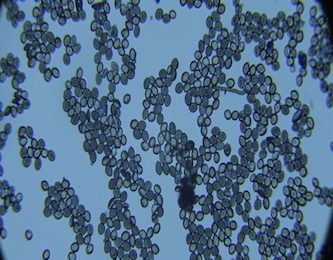
SAMPLING FOR MOLD AND FUNGI
The process of sampling for mold and fungi is very nuanced, choosing the right location to sample as well as the appropriate test method can be a daunting task and is best left to professionals. With that in mind there are a number of home test kits available on the market which can help guide you through the mold sampling process. Should you choose to purchase one of these kits, or simply make your own, the following guidelines should be considered for each sample type:
– COLLECTING AIR SAMPLES FOR MOLD AND FUNGI TESTING
When collecting air samples for non-culturable (direct examination) based analysis you should use an appropriate air cassette and follow the manufacturer’s instructions. Often times this sampling process will require a special air pump to meet the flow requirements. Make sure to seal the inlet and outlets of the cassette after sampling to prevent contamination of the sample.
When collecting air samples for culture based analysis you should have already purchased an agar media plate, this will be used to collect the spores which fall out of the air. Place the plates on a surface approximately 1 Meter (3 feet) off the ground. Remove the lid and let the plate sit out for 1-4 hours, label the lids and place them face down next to the plate. Once the time is up replace the lid on the plate and seal with tape around the edge of the plate and lid, ensuring the plate and lid are firmly sealed together. Keep the samples in a cool dark place until they can be brought in to the laboratory, samples should be submitted as soon as possible.
– COLLECTING BULK SAMPLES FOR MOLD AND FUNGI TESTING
Bulk samples are quite simply pieces of material which have mold or fungi growing on them. When collecting a sample of bulk material ensure you are wearing appropriate personal protective equipment to protect yourself from any exposure caused by disturbing the material. Using a clean knife cut a small piece approximately 10cmx10cm (4 sq inch) and place it in a clean zipper sealing plastic bag.
Note: Materials which may contain asbestos such as drywall, plaster, flooring, popcorn ceilings or other materials should be tested by a professional as proper procedures are required to protect against contamination.
– COLLECTING TAPE LIFT SAMPLES FOR MOLD AND FUNGI TESTING
Tape lifting is a relatively straightforward procedure whether you are using purchased tape lift slides or simply a piece of scotch tape, the process remains the same. Taking a piece of tape 5-10cm long (2-3 inches) press the sticky side against the surface you want to test firmly. Avoid any rubbing motion as this may damage the samples. Once you have firmly pressed the sticky side against the surface carefully remove it and stick it in the inside of a sealable plastic bag trying to keep the tape flat against the inner surface of the bag. The spores and other particles of interest will be stuck in the adhesive of the tape and if this adhesive layer becomes damaged then that section of the sample cannot be analyzed.
– COLLECTING SWAB SAMPLES FOR MOLD AND FUNGI TESTING
Swab sampling kits are one of the more common types of surface sampling products. Swab samples can provide some information about a colony without the asbestos risk of bulk sampling procedures. When collecting swab samples it is important to use proper technique. Before taking the sample consider the surface; is the surface wet or dry? If wet you should use a dry sterile swab, if the surface is dry you should use a wet sterile swab. When taking the actual sample it is important to roll the swab along the surface, wiping or streaking the surface will disrupt the fragile characteristics of the mold structures and make the analysis less accurate. After the sample has been taken return the swab to the tube it came in and bring it in to the lab promptly to avoid sample degradation, store samples in a cool dark place until they can be brought in.
